Before launching the EasyBox Mtk application you should
install
smartcard drivers
and insert smartcard in the usb port.
EasyBox Mtk requires administrator privileges to work properly. After you launch the
application the standart windows dialog will appear with prompt to grant administrator privileges.
Click
'yes'.
If the smartcard is not inserted you will see the next message
Smartcard communication error(ListReaders failed).
This can occur if you haven't installed smartcard drivers.
at application start. After this message
application will shutdown. Application works only with constantly inserted smartcard.
Never unplug
EasyBox smartcard while working with EasyBox Mtk. Application will immediately shutdown,
which can lead to serious problems with ongoing process, even brick the phone.
Application start
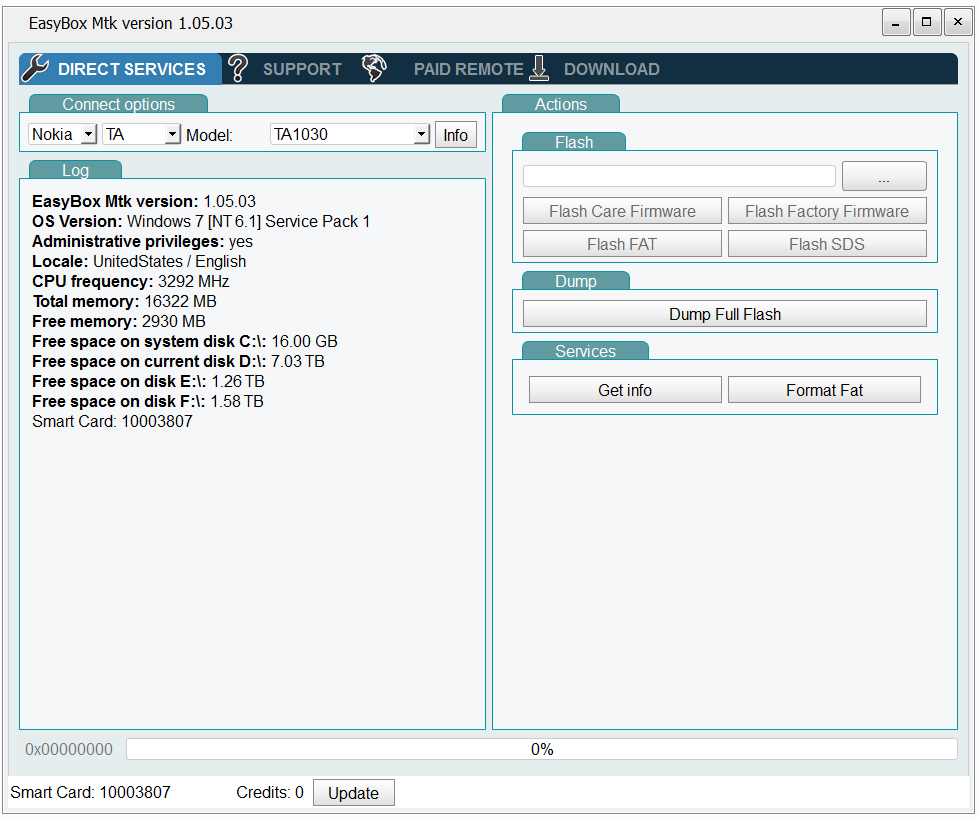
After launching application you will see the next window.
Main window
It is devided into two parts - the 'Log' panel on the left and the 'Actions' panel on the right. The 'Actions' panel
contains buttons for different operations. Now you cant perform any action except 'Connect'
because all other actions can be performed only after you
connected to the phone.
Choosing the model of the phone.
Before you start to work with the phone you need to choose the right model.
To do it, use family/model dropdowns
in the upper-left side of the 'Direct services' window.
First - choose the phone family, then choose the model.
For example: to choose 5034D - select '50xx' family and then choose '5034D'
Info button
Before starting any work with the phone it is better to read a 'Phone manual'. Yoy can read the 'offline'
version of the manual by clicking on Info button near the
Model: dropdown. Or you can open the online version
here.
Connecting to the phone
Choose the model of the phone you need to connect.
Than press the 'Connect' button. The instruction will appear in the log what to do to connect to the phone.
Usully you need to switch off the phone and connect it to the pc with the micto-usb cable.
If the connection is succesful there will appear info about the phone at the log panel and all other
actions will become available.
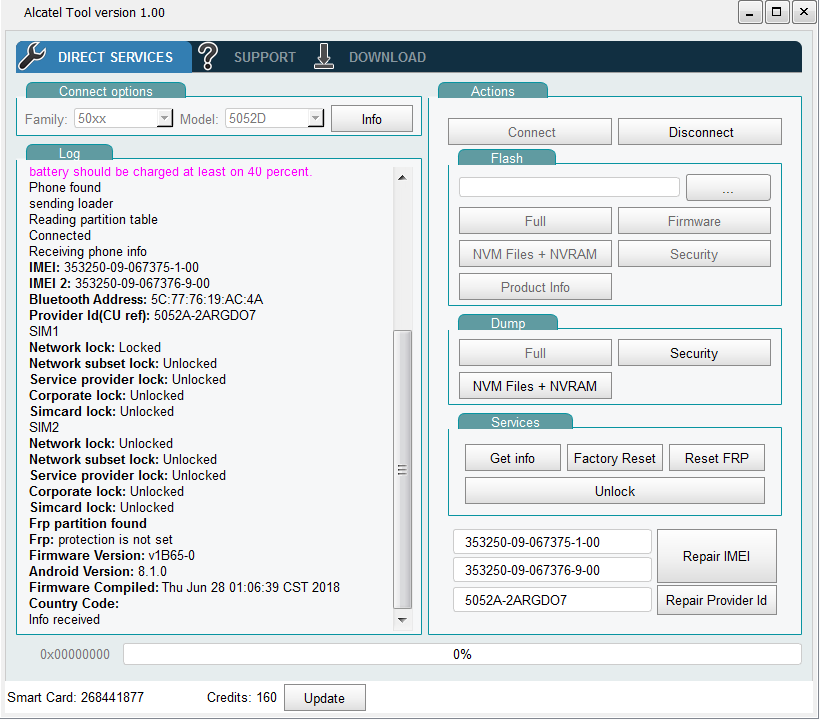
Connected phone
Get Info button
If you need to print the information about connected phone once more, you can click on
Get Info button.
This operation is read only and doesnt change anything inside of the phone.
Usually the following information is accesible:
Imei numbers
Provider Id(For Alcatel phones)
Simlock information
Firmware version
Android version
Firmware compilation date time
Performing different operations
The majority of actions is performed by clicking on the appropriate button. For example, to unlock the phone you
need to press 'Unlock' button and wait until process is finished. To repair imei you also need to
type new imei numbers before clicking on 'repair imei' button.
While the action is performed all other actions except 'Cancel' are disabled.
If the action is finished the 'Succesful' message
will appear in the log and all other actions become available. If some error occurs during the work process
the exception message will appear in the log and the cation process will be aborted. You can check the exception
message in the
Known exceptions page.
Dumping files
There are several types of dump files you can make with EasyBox Mtk.
Full - dumps all flash device from the phone. The output file size depends on
the size of the phone flash device and can be up tp 64Gbs.
The process of dumping can last several hours.
Security - dumps only security partitions. This file will return simlock data
to its original state if you flash it back.
It is recomended to dump security before unlocking the handset.
This way you always can return you simlock data back.
NVM files and nvram - dumps nvm files from 'userdata' partition o 'nvdata' partition.
Also dumps nvram partition.
All dumped files are saved in internal EasyBox Mtk file format *.sbf.
Flashing files
There are several types of files you can flash with EasyBox Mtk.
Firmware - Flashes original Alcatel firmware roms.
The alcatel box supports two file formats of flash-firmware files.
The 'sbf' files. This is an internal file format of the EasyBox Mtk application
The 'sca' files. This is format used by Alcatel to flash phone firmware. You can choose
this file extention in the open file dialog
You can download firmware roms for the Alcatel phones on this site.
See Downloading
firmware
Security - restores security partitions. This file will return simlock data
to its original state if you flash it.
NVM files and nvram - dumps nvm files from 'userdata' partition o 'nvdata' partition.
Also dumps nvram partition.
Full - flashes whole internal flash memory.
The process of flashing can last several hours.
It is strongly prohibited to do this operation.Flashing wrong full-flash file will brick your device.
The EasyBox Mtk uses *.sbf file for all flashing operations.
Flash Firmware operation also supports Alcatel sca assemblies.
Usual 'sca' Mediatek files are not supported! You need to use original Alcatel folders
with sca files.
Trying to flash third-party sca assembly will lead to undefined results.
To flash file, press '...' button on flash panel at the upper right of the main window and select appropriate file.
Then press on the action button - 'Full', 'Firmware', 'NVM Files',
'Security' depending on the operation you want to perform.
Restoring original data from 'Backups' folder
In almost all operations which require some changes inside phones flash device, EasyBox Mtk makes a backup
files in the 'Backups' folder. This folder is placed in the EasyBox Mtk root folder.
In case you are not pleased with the result of the operation, you can always flash a backup data back into phone.
For example, before an 'unlock' operation the EasyBox Mtk saves backup of security data in the backups folder
in the form of security.sbf file.
You can flash this file into the phone and restore original simlock state of the phone.
Disconnecting from the phone
After you finished all needed operations with the phone you need to click 'Disconnect' button before you disconnect
the cable from the phone.